


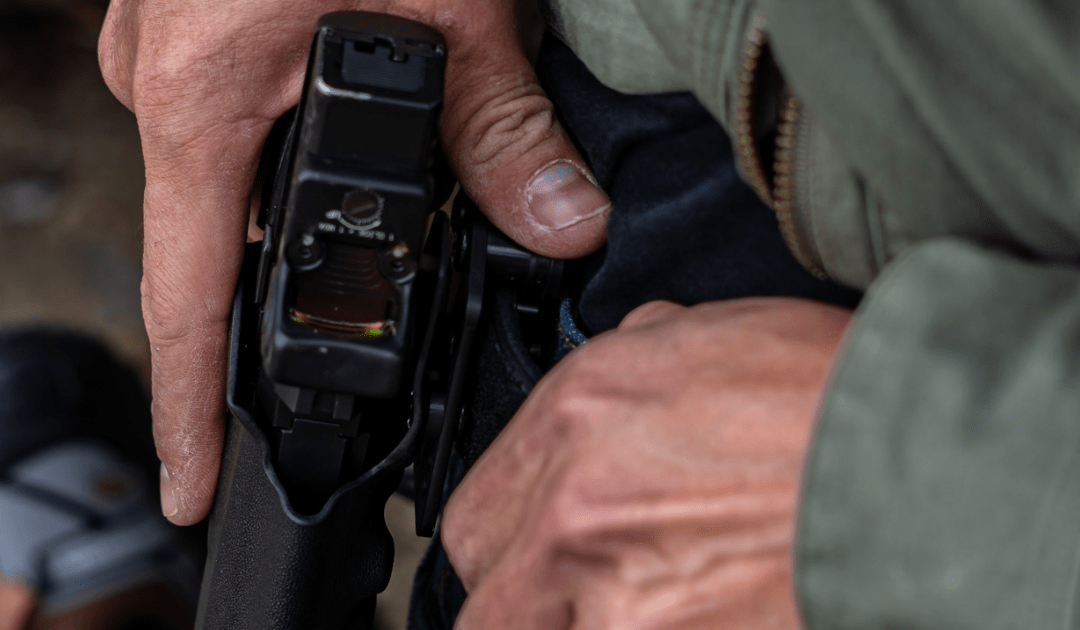
The NeoMag Alias Belt System offers an innovative solution designed to better your carrying experience by providing a stable and versatile platform for your holster.
Let us walk you through the step-by-step installation of your Alias Receiver with brackets. From understanding the Alias components to customizing your setup for comfort and accessibility, we’ll provide you with all the tips and insights you need to achieve the perfect setup.
What is the Alias System?
The Alias System is a modular holster attachment system that securely attaches your holster to most EDC belts on the market, the Alias Belt, a wide range of surfaces, and even gym shorts with a beltless receiver.
The Alias System includes several elements that make it a standout:
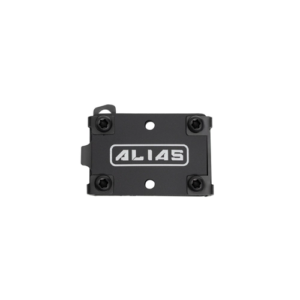
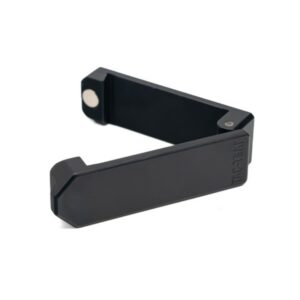
- All-Metal Clip & Locking Receiver: These components are crafted from lightweight aluminum, creating a solid connection between your belt and holster.
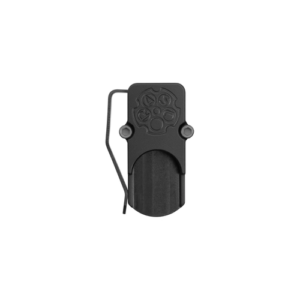
- Receivers: Various receivers can be attached to the inside of the belt, accommodating different holster clips and adapters. This allows for quick adaptability and secure attachment whether you prefer Inside-the-Waistband (IWB) or Outside-the-Waistband (OWB) carry if you use the Alias Belt.
- Compatibility: The system works with most Kydex holsters, particularly those using standard clip styles like Top Mount/Monoblock/Soft Loops and Bottom Mount/Vertical/DCC.
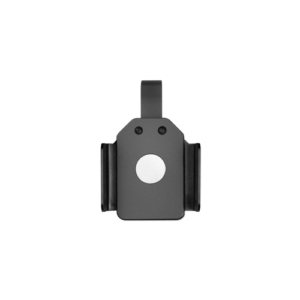
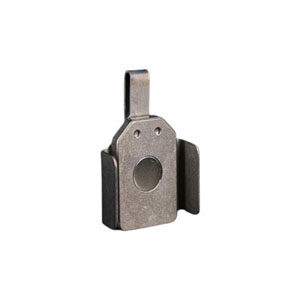
What is the Alias Receiver with belt brackets?
The Alias Receiver with belt brackets is designed to attach your holster to your belt securely. The Receiver offers belt brackets in two primary sizes: 1.5 and 1.75 inches, which work on belts up to .2” thick.
- 1.5-inch Brackets: Ideal for dress belts and EDC belts, providing a secure fit.
- 1.75-inch Brackets: Suitable for 1.75 EDC belts often used in tactical or duty scenarios, creating stability and security.
The Alias Receiver is a locking point for the holster’s clip, allowing for quick attachment and detachment while maintaining stability and reliability. The belt brackets distribute the firearm’s weight evenly to increase comfort and stability.
Setting Up the Alias Receiver with Belt Brackets
To set up the Alias Receiver, you’ll need the following tools and materials:
- Torx key: Essential for fastening the screws that secure the belt brackets and receiver.
- Blue Loctite (optional): Helps to secure screws and prevent them from loosening over time.
Step-by-Step Installation Guide
Preparing Your Belt
- Check compatibility: Verify that your belt is either 1.5 inches or 1.75 inches wide (and no thicker than .2”) to match the bracket size.
Attaching the Receiver to Your Belt
- Slide the receiver onto the belt: Slide the Alias Receiver onto your desired belt location (e.g., appendix, 3 o’clock, 4 o’clock).
- The flat side of the Receiver will be the part that touches your body and should be facing inward.
- Adjust the fit:
- If the receiver rocks, loosen all four screws slightly using the Torx key.
- Slide the belt brackets out a bit, then lightly tighten the screws to lock them in place.
- Use hand strength to pinch the brackets inward slightly to close the angle and tighten the fit.
- Then loosen the screws again, slide the receiver over your belt, and pinch the brackets closed.
- Retighten the screws but don’t over-tighten to avoid stripping.
- Final adjustments:
- Confirm the receiver is snug on the belt and does not rock or slide around. Adjust as needed for a secure fit.
- Optionally, apply a small amount of Blue Loctite to the screws for added security and to prevent them from loosening over time.
Attaching the Receiver When It Doesn’t Fit Over the Belt Loop or Buckle
- Loosen the screws: Loosen all four screws on the Receiver slightly using the Torx key.
- Position the receiver: Slide the belt brackets to the widest setting so the Receiver fits over the top of the belt or webbing.
- Fit the receiver over the belt: Carefully slide the receiver over the belt or webbing.
- Tighten the screws: Once the receiver is in place, tighten the screws slightly to hold it in position.
- Pinch the brackets: Use hand strength to pinch the belt brackets inward to reduce the angle and tighten the fit.
- Secure the brackets: Loosen the screws again slightly, adjust the brackets to fit snugly against the belt, and then retighten the screws securely, ensuring not to over-tighten.
Fine-Tuning
- Adjust belt brackets: After installation, check for any movement or rocking of the receiver. If necessary, adjust the position of the belt brackets to achieve a stable setup (see the section on Troubleshooting below).
- Secure screws: Periodically check the screws and re-tighten them if needed. This keeps the receiver securely attached and doesn’t slide during use.
Expert Note: Allowing Slight Movement for Adjustment
It’s often helpful to allow the receiver to slide slightly on the belt after installation. This can help you fine-tune its position once the belt is worn.
After putting on your belt, slide the receiver to the spot where it feels most comfortable and provides the best accessibility for your draw. Once positioned correctly, check the screws are tightened enough to maintain this placement without significant movement during daily activities.
Customizing Your Setup
How to Adjust the Ride Height for Comfort and Accessibility
Adjusting the ride height of your holster is important for both comfort and accessibility. Here’s how you can do it:
- Identify the holster’s mounting options: Most holsters compatible with the Alias System offer multiple mounting holes (top or bottom) for adjusting ride height.
- Choose your preferred height: Decide whether you want a higher or lower ride. A higher ride can make drawing the firearm quicker, while a lower ride may offer better concealment.
- Reposition the clips: Unscrew the clips from their current position (depending on your holster clip, you may need a Phillips-Head screwdriver for this). Reattach them at the desired height, verifying the screws are tightly fastened.
- Test for comfort: Wear the belt with the holster attached and practice drawing your firearm. Adjust as needed to find a balance between comfort and accessibility.
Differences Between Top Mount and Bottom Mount Holsters
Top-mount holsters attach at the top of the holster body, allowing the firearm to sit lower on the belt. This setup often provides better concealment but may sacrifice some speed.
Bottom-mount holsters attach at the bottom, positioning the firearm higher on the belt. This can be quicker to draw but might print more under clothing.
Adjusting the Setup for Maximum Comfort During Everyday Wear
- Holster angle: Adjust your holster’s cant to align with your draw’s natural motion. A slight forward cant can improve ergonomics and speed.
- Positioning: Experiment with different positions on your belt (e.g., appendix, 3 o’clock) to find what’s most comfortable for your body type and daily activities.
Alias Tips and Best Practices

Regular Maintenance
Regular maintenance is important to keep your Alias Receiver in top condition. Here are some key practices:
Checking and Tightening Screws
Over time, the screws securing your belt brackets and Receiver can loosen due to daily wear and movement. To keep the Alias System secure:
- Routine inspections: Check the screws weekly or after extensive use.
- Use a Torx Key: Tighten any screws that have become loose. Check that they’re snug, but avoid over-tightening to prevent stripping.
Applying Blue Loctite for Additional Security
For added security, applying Blue Loctite to the screws can prevent them from loosening.
- Remove screws: Take out the screws one at a time.
- Apply Loctite: Place a small drop of Blue Loctite on the threads.
- Reinsert and tighten: Screw them back in securely. Allow the Loctite to cure according to the manufacturer’s instructions for maximum efficacy.
Troubleshooting Common Issues
Even with careful setup and maintenance, you may need some help. Here’s how to address common issues:
Receiver Rocking
- Check alignment: Verify the belt brackets and receiver are correctly aligned. Misalignment can cause the receiver to rock.
- Tighten screws: Make sure all screws are securely fastened. Apply Blue Loctite if necessary.
- Adjust position: Adjust the brackets slightly to see if that stabilizes the receiver.
Belt Compatibility
- Belt size: Verify that your belt is the correct width (1.5” or 1.75”) for the brackets you use.
- Material and rigidity: Check that your belt is made from suitable material and has enough rigidity to support the holster and firearm. Flimsy belts can lead to instability.
Embrace the convenience of the Alias System.
Carry confidently and enjoy the increased comfort and security the NeoMag Alias Receiver Belt System provides!
Hello, I recently purchased the Tenicor Certum 3 and it uses double dcc clips. I was wondering if this belt reviever was compatible with the double clips. Or if it would be possible to use two receivers for each clip?
Hi Diego,
With the Alias system, you would only need to put one clip on to replace the double DCC clips on the Tenicor Certum 3. You do not need 2 Alias clips. Choose which set of holes you would like the Alias clip on, screw it into place and you’re good to go with the Alias Receiver of your choice.
Thanks,
Nate